Geometry Nodes in Blender

In the winter of 2022, I started working on Geometry Nodes in Blender. This topic looked really interesting to me and I had seen multiple artists creating the most beautiful models by using this feature in the correct way.

LEGO Geometry Node

Planet Generator Node

When I make my way through more nodes they will be on this page.
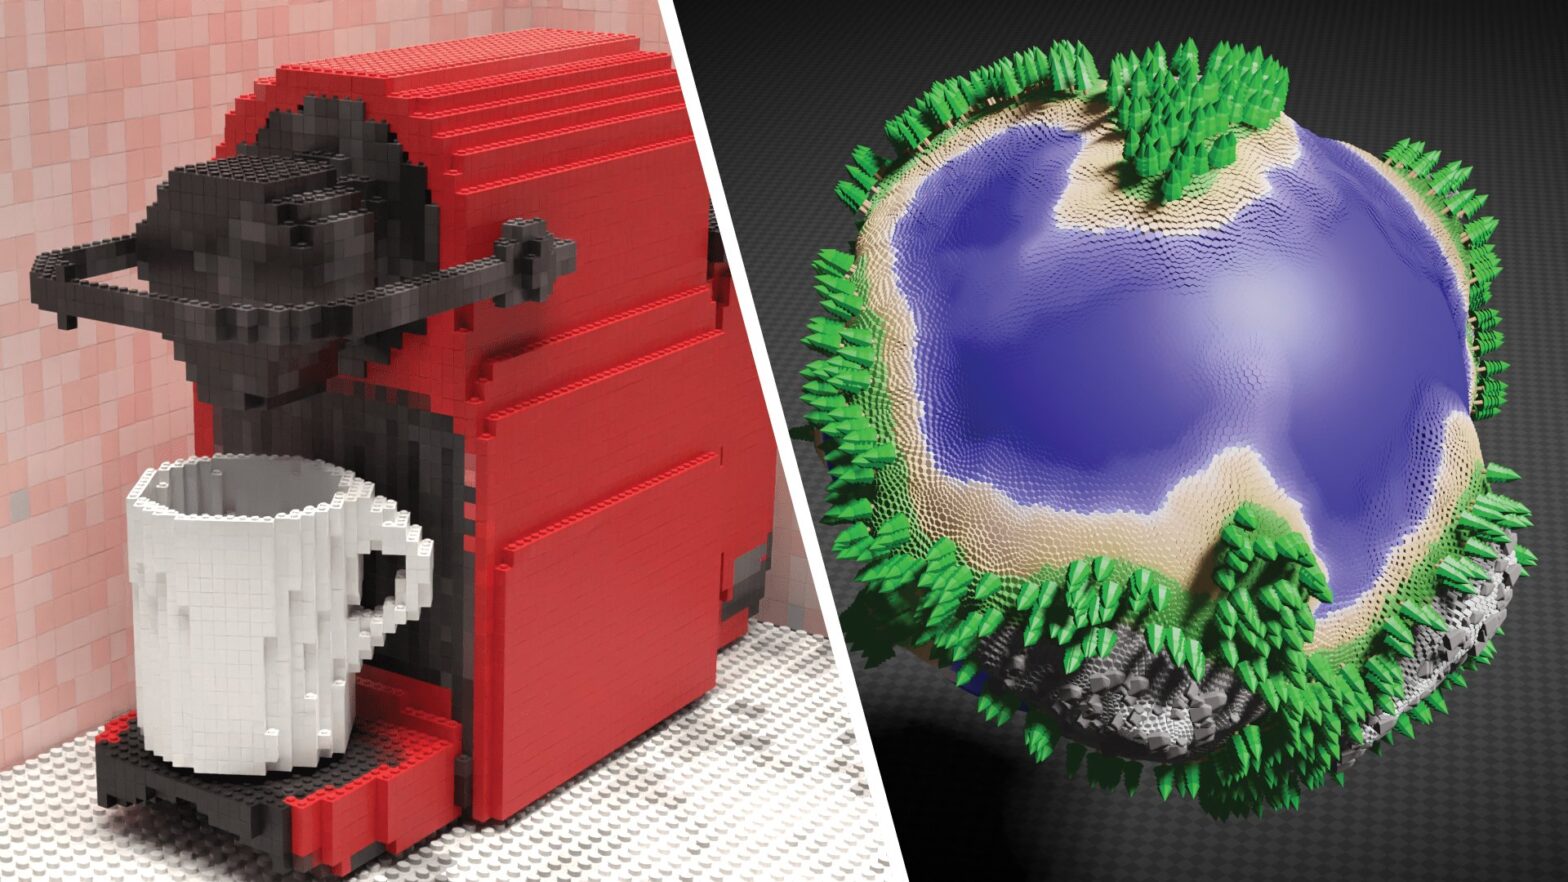
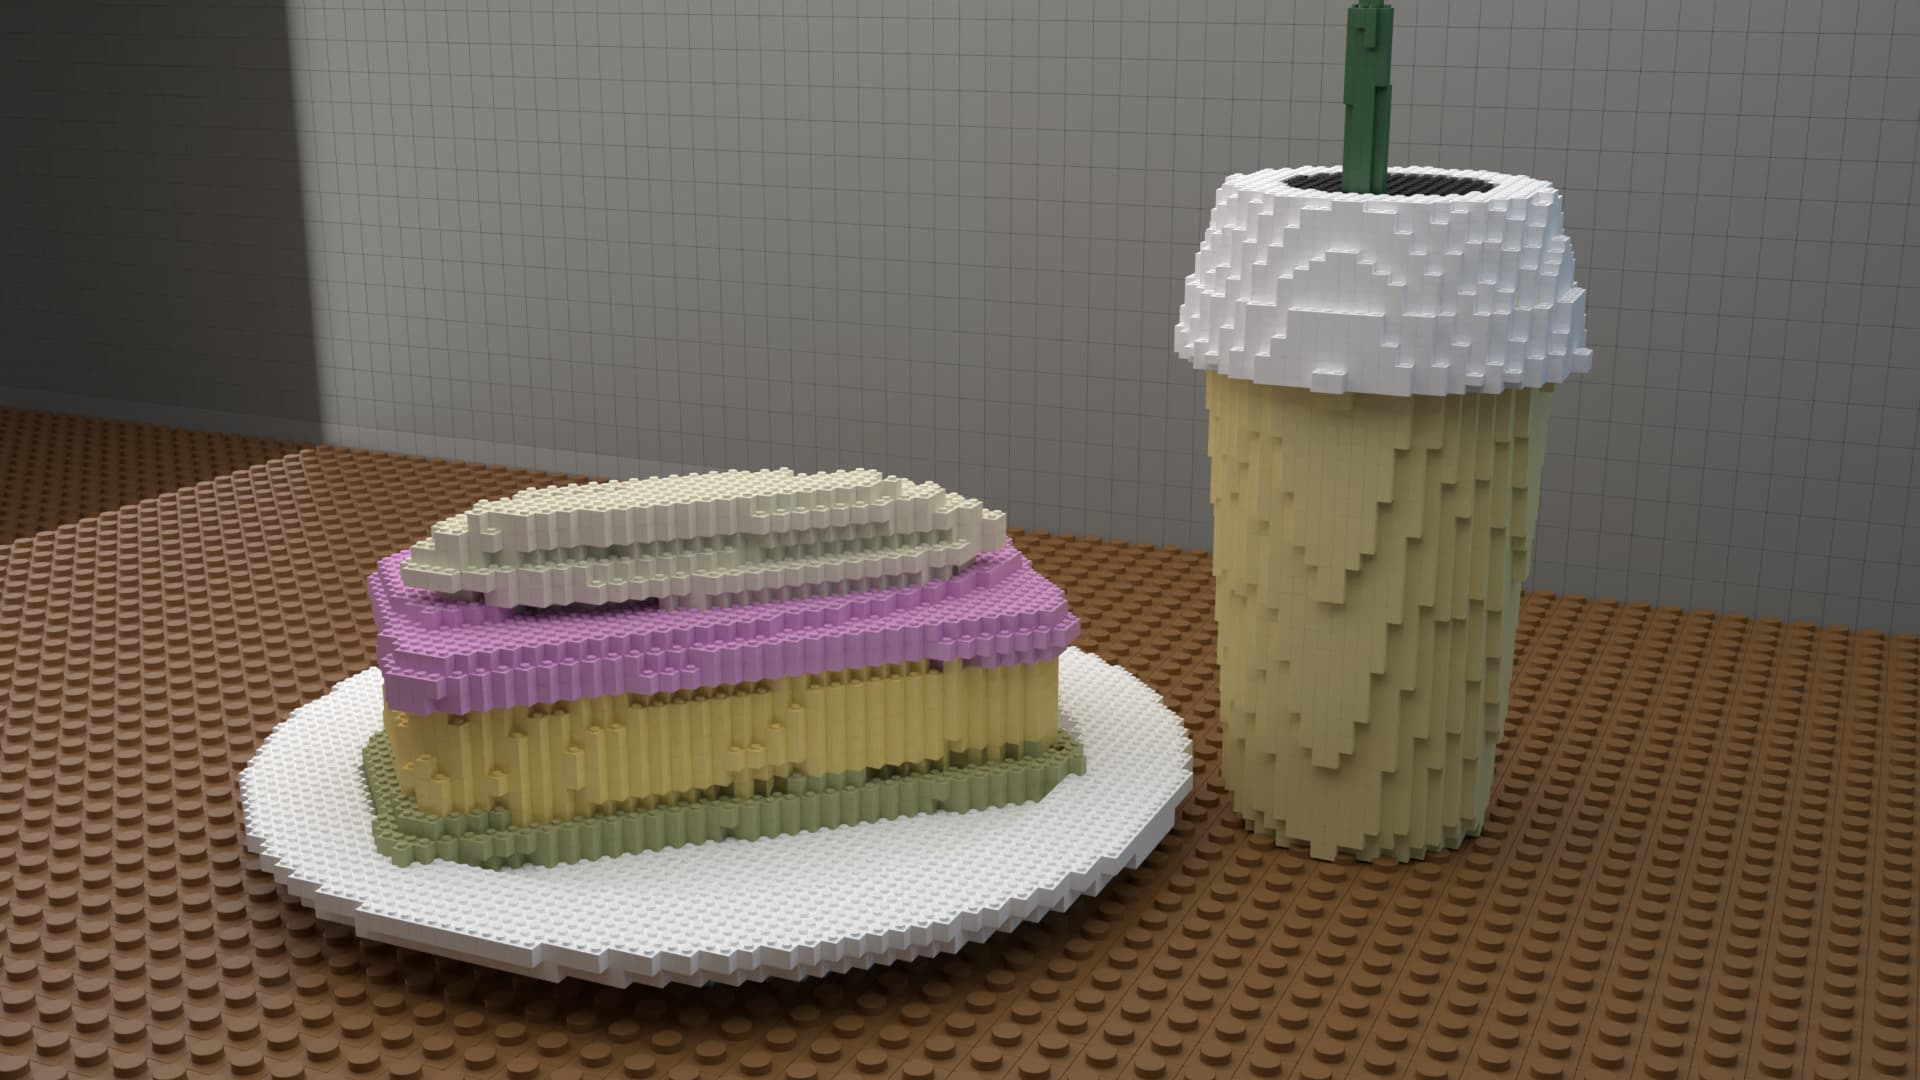
LEGO Geometry Node

I created this geometry node with the help of a tutorial from Joey Carlino. Then I applied it on multiple projects I have previously worked on as well as a brand new project I made specifically for this node.

Lego Geometry Node Setup
The node setup

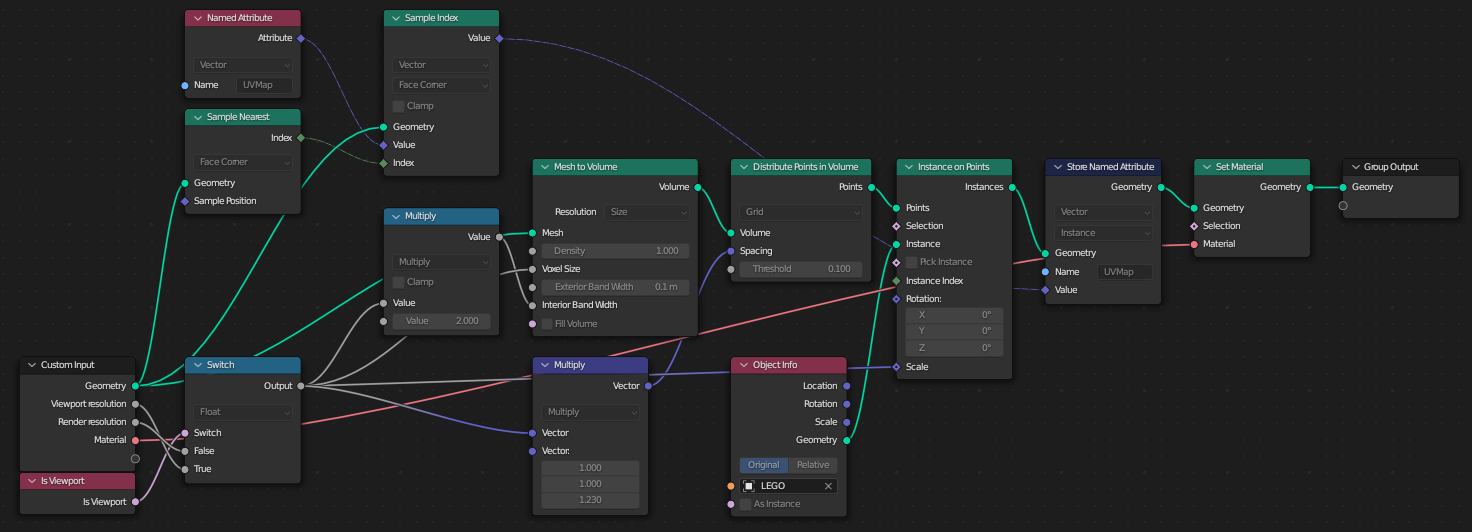
What I’m trying to do here is replace a certain amount of points in the mesh’s volume with lego blocks. Based on the variable quality there will be more points and thus more lego blocks. Then I’m applying the old UVs to see what color is nearest and applying said color on the brick.
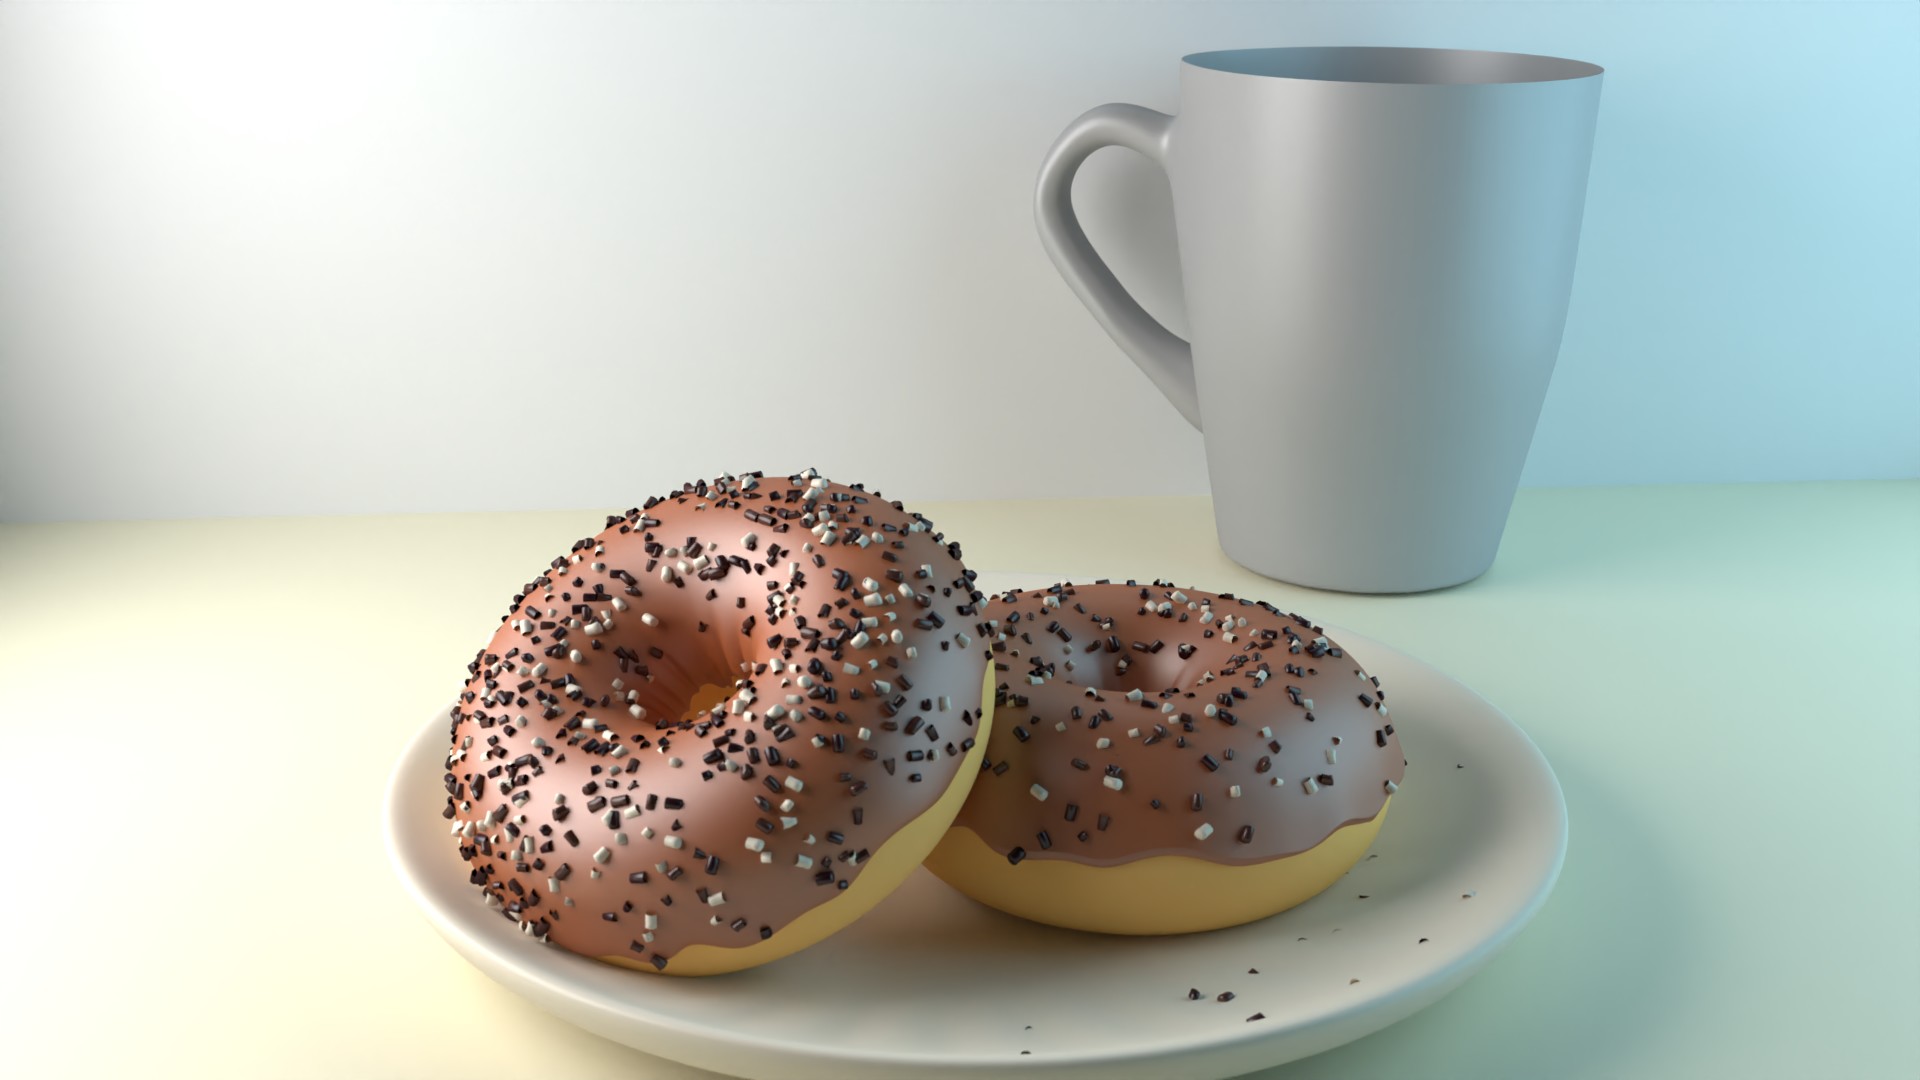
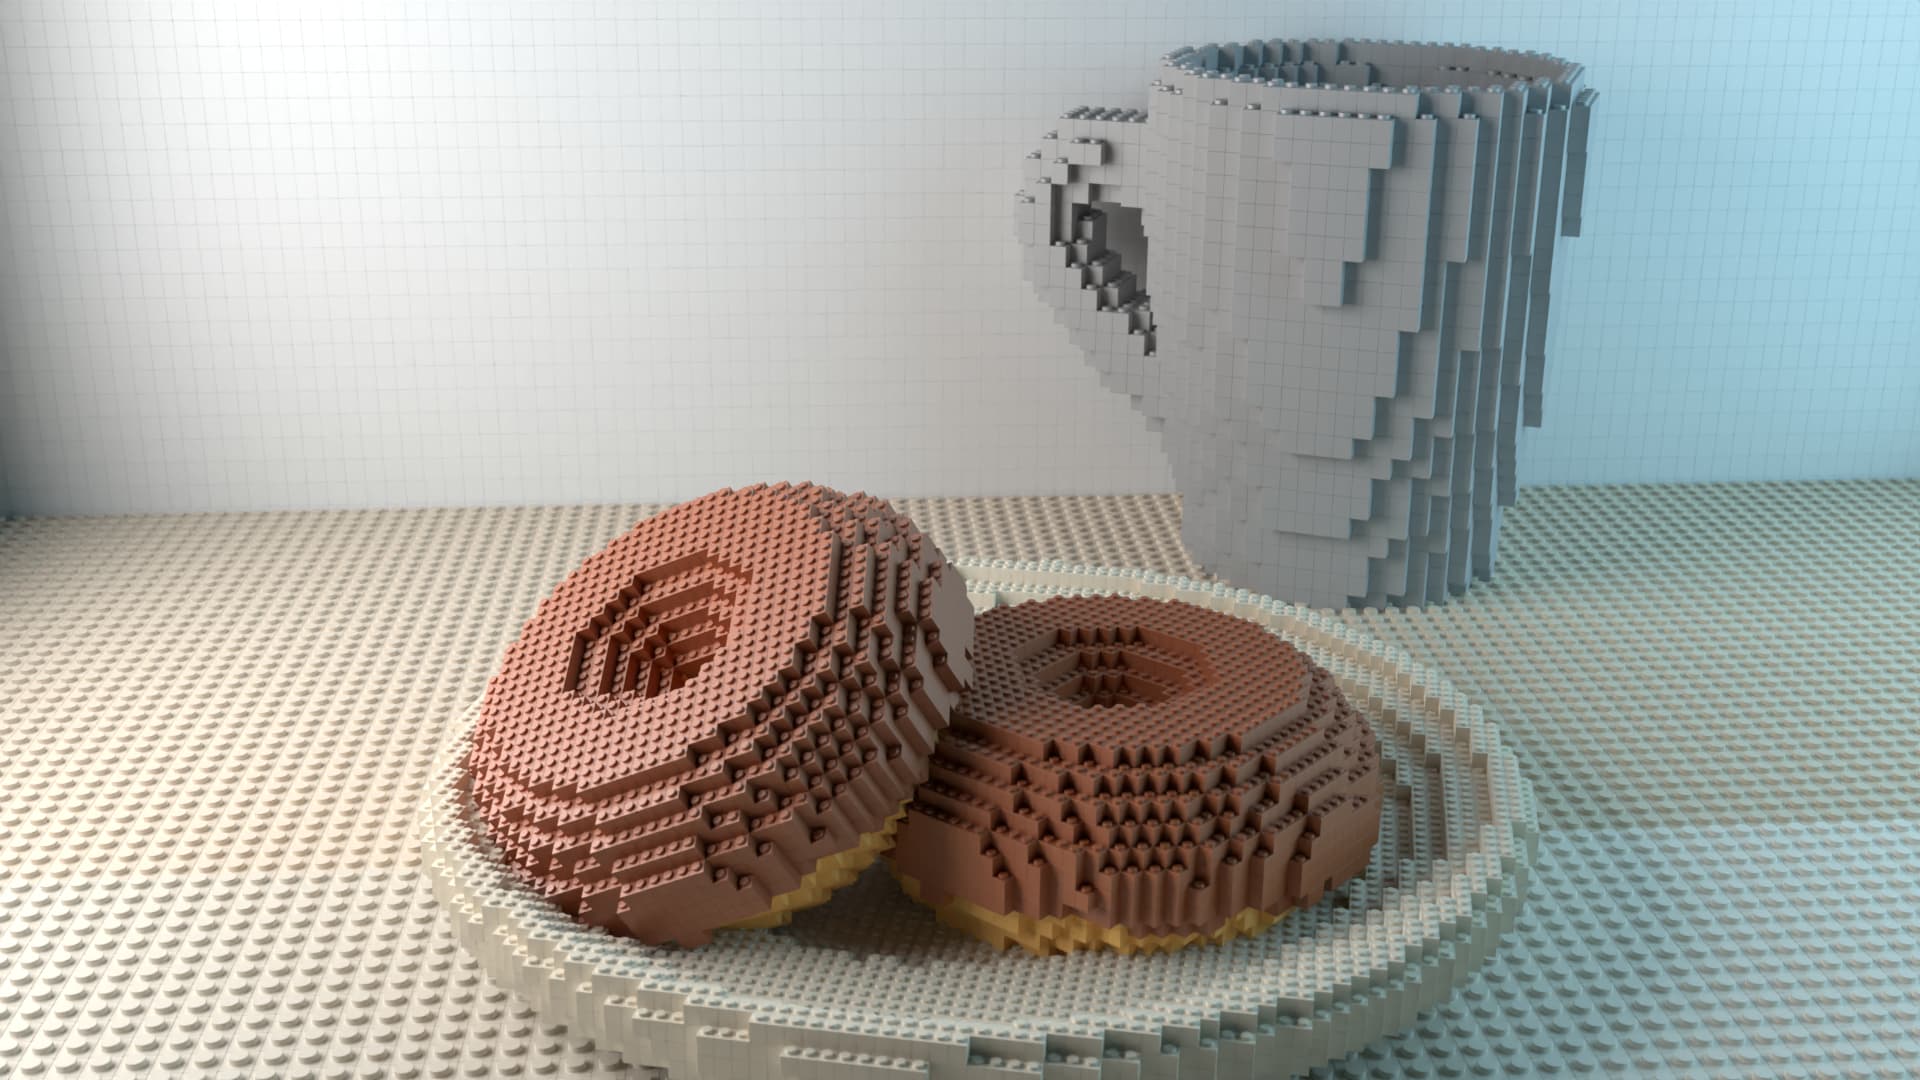
Examples

Planet Generator Node

I created this geometry node after being inspired by this post on reddit. I then researched a few techniques and started working on this project. After about a week I finished and this is the end result.

The node setup

void

Examples

Isometric Room: Bedroom In The Attic

I’ve always wanted to try my hand at an isometric room design. This one got heavily inspired by one of our old bedrooms.

I started by creating mood boards using Pinterest. Then I followed a quick tutorial to get started and mostly went on my own from there. I worked on this project for several days, documenting the progress I had made at the end of each day, combined with rendering a final image for the day.

I also took the time to learn more about the material node system in Blender as I previously only used base colour- and normal maps.

After this project, I have learned how to add controlled randomness (for example for books or clothes) as well as use built-in textures to add relief to the floor for example.

An example of a node setup for a random book cover material.

Management Simulation: Food Frenzy

Personal portfolio was a rather difficult subject for me. I had so much that I wanted to do but I did not know where to start. I had many ideas, one better than the other and another way too ambitious. Not knowing better I chose the latter. One of the games I have always wanted to make was an economic simulation game with food trucks.

I created a basic setup for my game in Unity. The main things I wanted to implement were good-feeling camera movement, an object placement system and basic UI. These were the iterations that I made:

The core thing I learned from this was that functionality is more important than visuals when prototyping. This is obvious but it is something I have struggled with before as I like to make everything look decent first.

I also wanted to create three different low-poly 3D models. A food truck, a picnic table and finally a tree. As shown in the videos above already.

3D modelling is something I really enjoy, it feels as if I am drawing digitally.

Finally, the last thing I did was document the general idea of the game. The document I wrote can be found here.

Time to move on to the next part where I continued my work on food frenzy.

Golf Game: Golf Without Your Friends

At the end of the first year, we finally started with Unity. In my free time I had used Unity a bit before and in comparison to Processing, GxP and Flowlab.io it allows you to do so much more. I was really excited to start working on this subject and I had a ton of ideas.

I went ahead and started working on a golf game. I called it “Golf Without Friends” (a parody of golf with friends) as it is a single-player game.

During the process I followed some tutorials, the most important one being this one. After watching that I was able to implement the movement of the golf ball and the action of controlling it. I then went on to 3D model all of the different holes (levels) I wanted to create.

Some of these levels I based on my recent mini-golf experience. Others were based on inspiration I found on Pinterest. After 3D modelling them I looked for materials that would fit them well.

The final step was to use post-processing, this is where the visuals were improved a lot just by tweaking some image effects. I also added a motion blur to improve how fast it felt to hit the ball and a custom skybox as I wanted real clouds and better environmental lighting.

If you want to play the game yourself, you can click the button below.

Board Game: Hammer Slammers

The first project of my study, CMGT. The goal of the project was to create a board game inspired by one or more digital games.

We thought of fun ideas and eventually came to the concept of creating a board game inspired by fall guys, the player(s) would have to throw a dice to reach the top to finish as fast as they could. We worked out different obstacles that the player would need to pass.

The board would be divided into three layers, each more difficult than the other. The gameplay would feel a bit like “Ganzenbord“, touching the wrong cell will see you being moved back and getting lucky would see you jumping in front.

The first few steps of designing the board

We asked one of the artists to create different tiles which we’d place on the board to show what action needed to be taken. I made the board in Blender 3D, and during the two weeks, we made three different iterations.

  • The first iteration with basic colour-coded mechanics

The first iteration was just to test if the game worked and if the cells were in the right place, and then we moved on to the second one.
This also was not yet what we wanted and it didn’t look that great.
Also, the artists were done with the tiles and so I decided to work on the final board, one with different stones as cells. Each cell that needed a visual tile on top of it had one and the game played well.

During the process, we also thought of a little backstory. Basically, princess pineapple was captured and the pawns (each with their own little backstory) had to try and save her. The first to reach her would win her hand and thus, the game.

The only thing left to do was to create an imaginary box in which we’d sell the game and create a game trailer which you can find below.