AR Experience: Eden’s Golden Rule

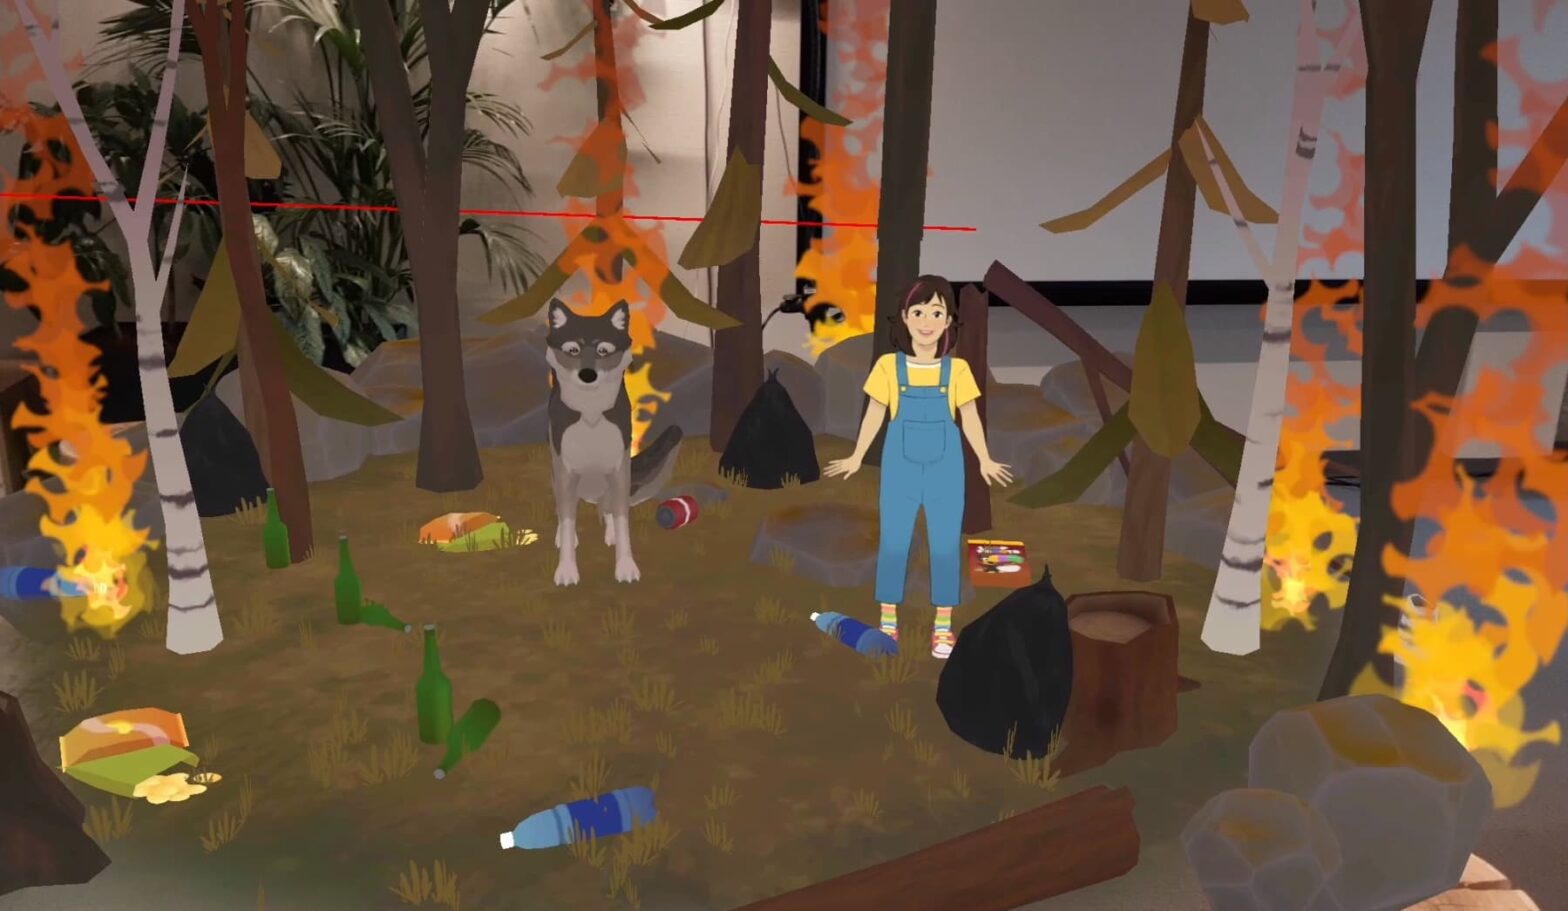
From February until the end of June 2024, I worked on developing an Augmented Reality (AR) experience designed for the JCK in Amsterdam.
The goal of the project was to create a new take on the previously made Eden’s and the Golden Rule VR installation. This ‘Golden Rule’ is as follows:

“In everything, do to others what you would have them do to you.”

Gospel of Matthew (7:12)

During the project I was part of a team made up of three artists and two designers as well as one developer (me). I was responsible for everything in regards to programming, from implementing the voice overs to implementing a game-wide system to keep track of scenes and advance through different phases. Next to that I have developed several smaller systems to solve more specific problems we encountered during the development.

My first few weeks revolved around getting to know AR and the inner-workings within Unity regarding Extended Reality technologies. I had never worked with anything like it before and started learning from the first second.

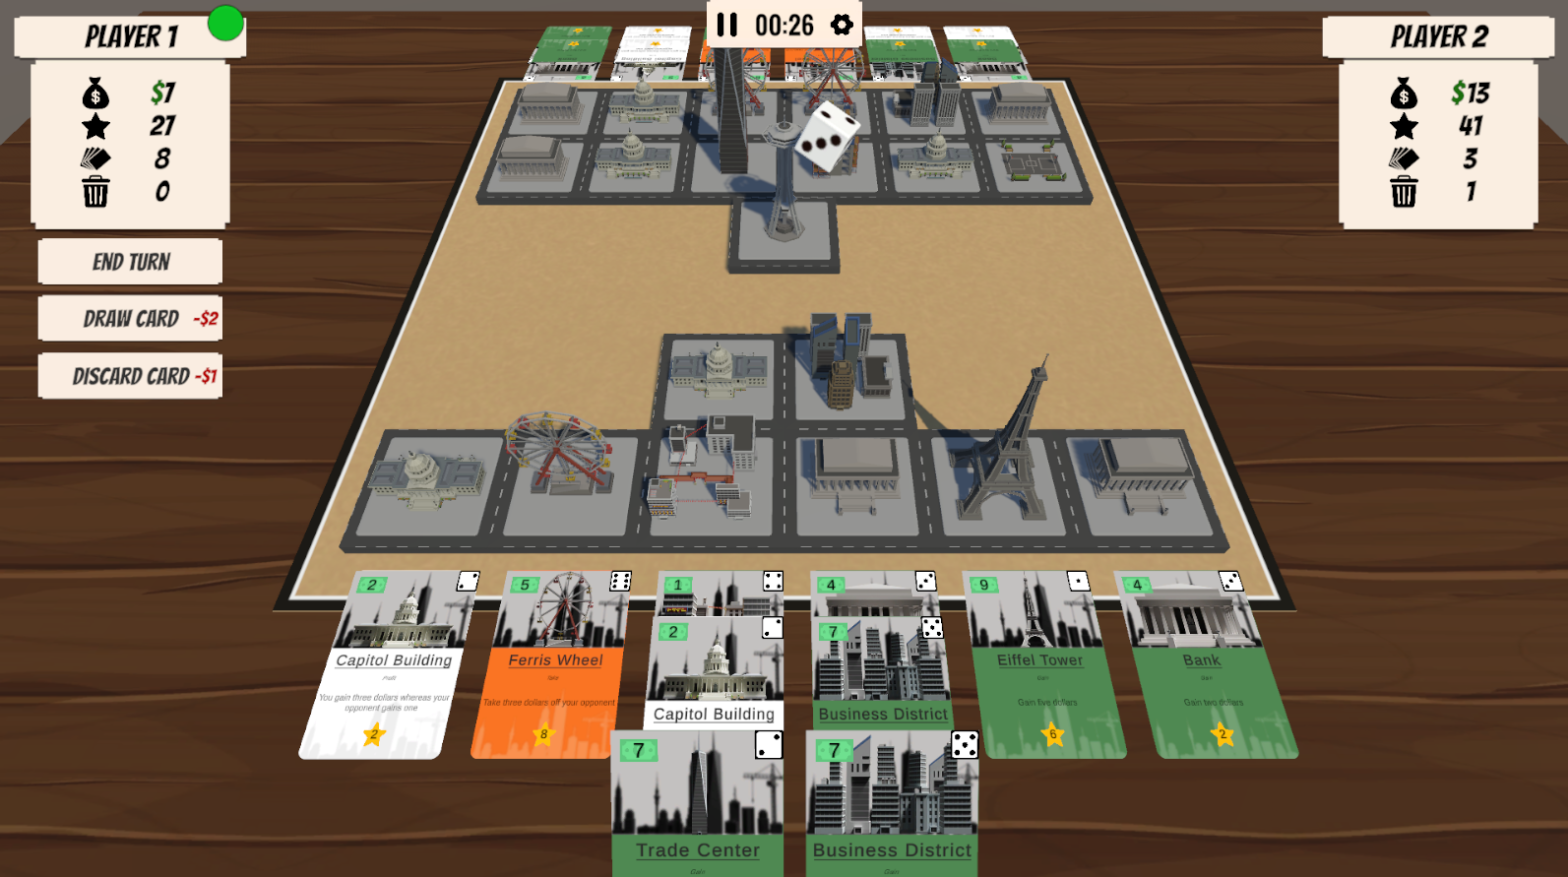
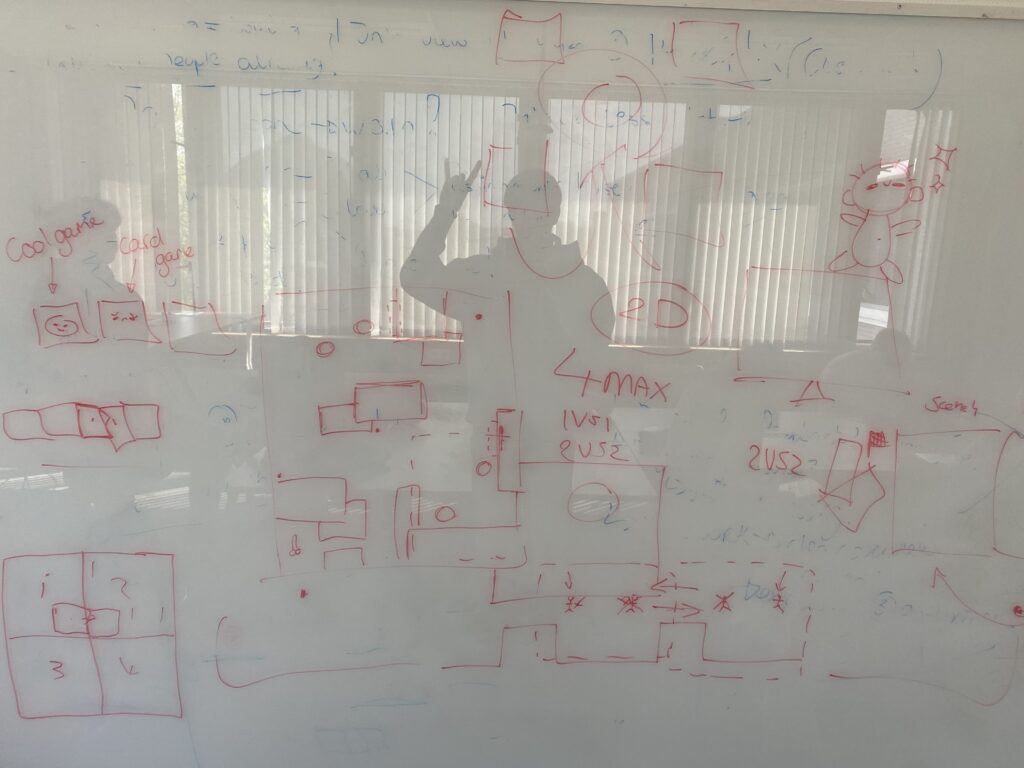
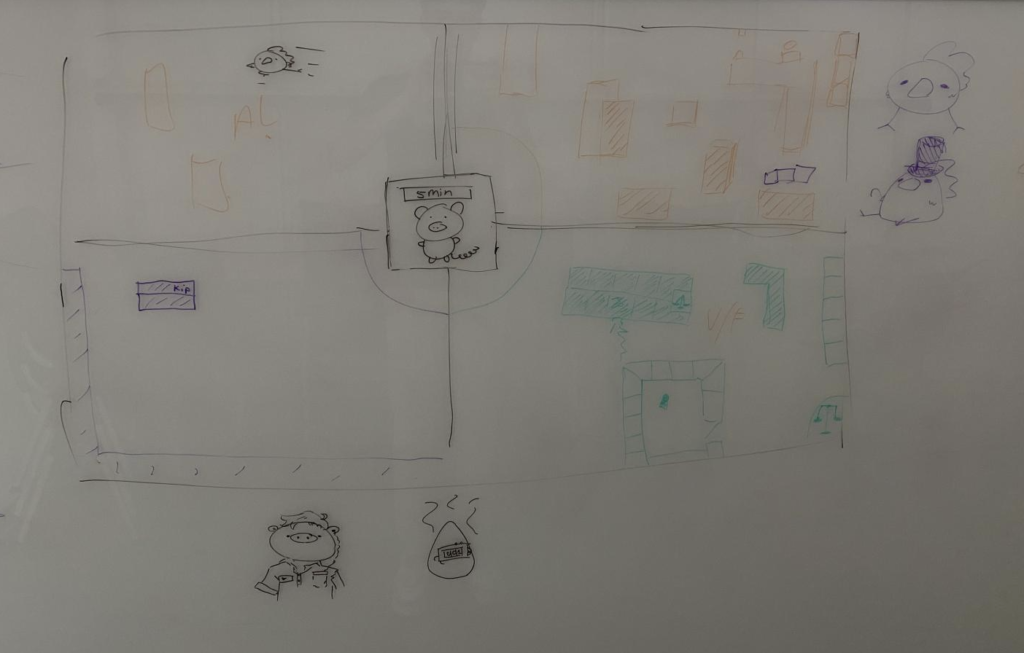
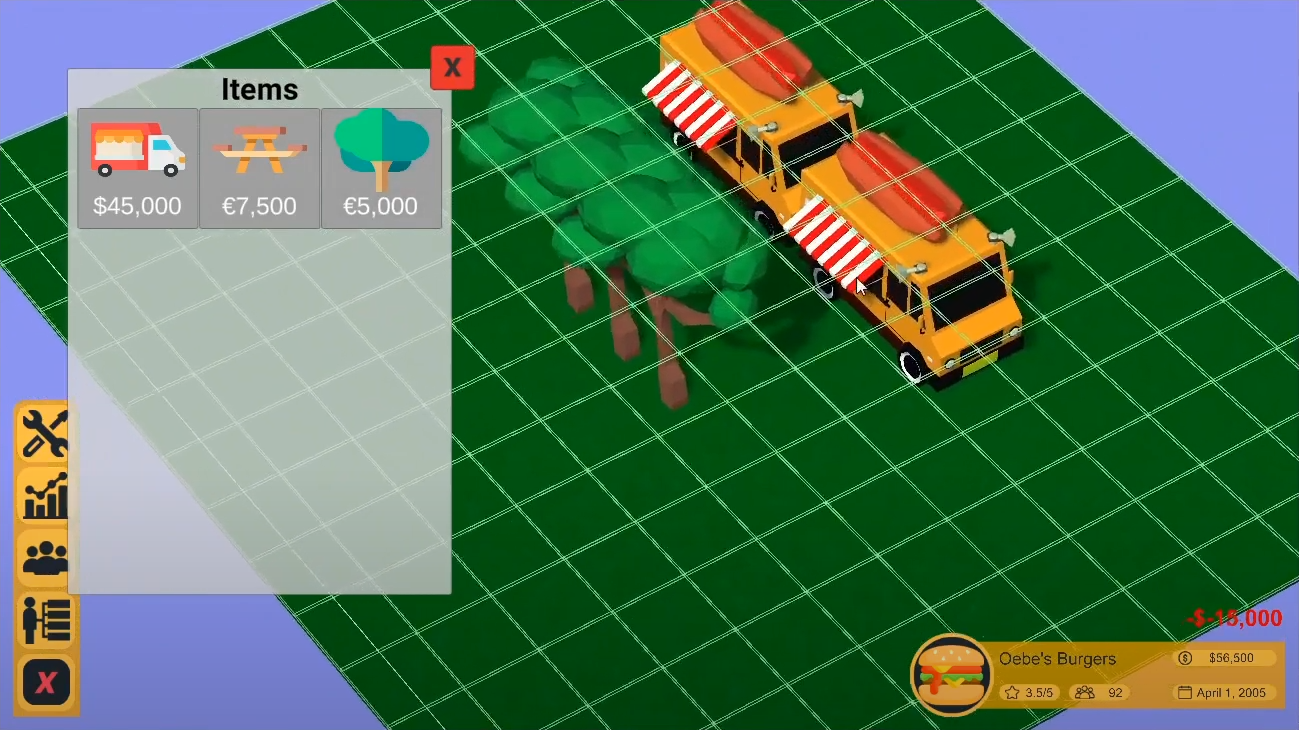
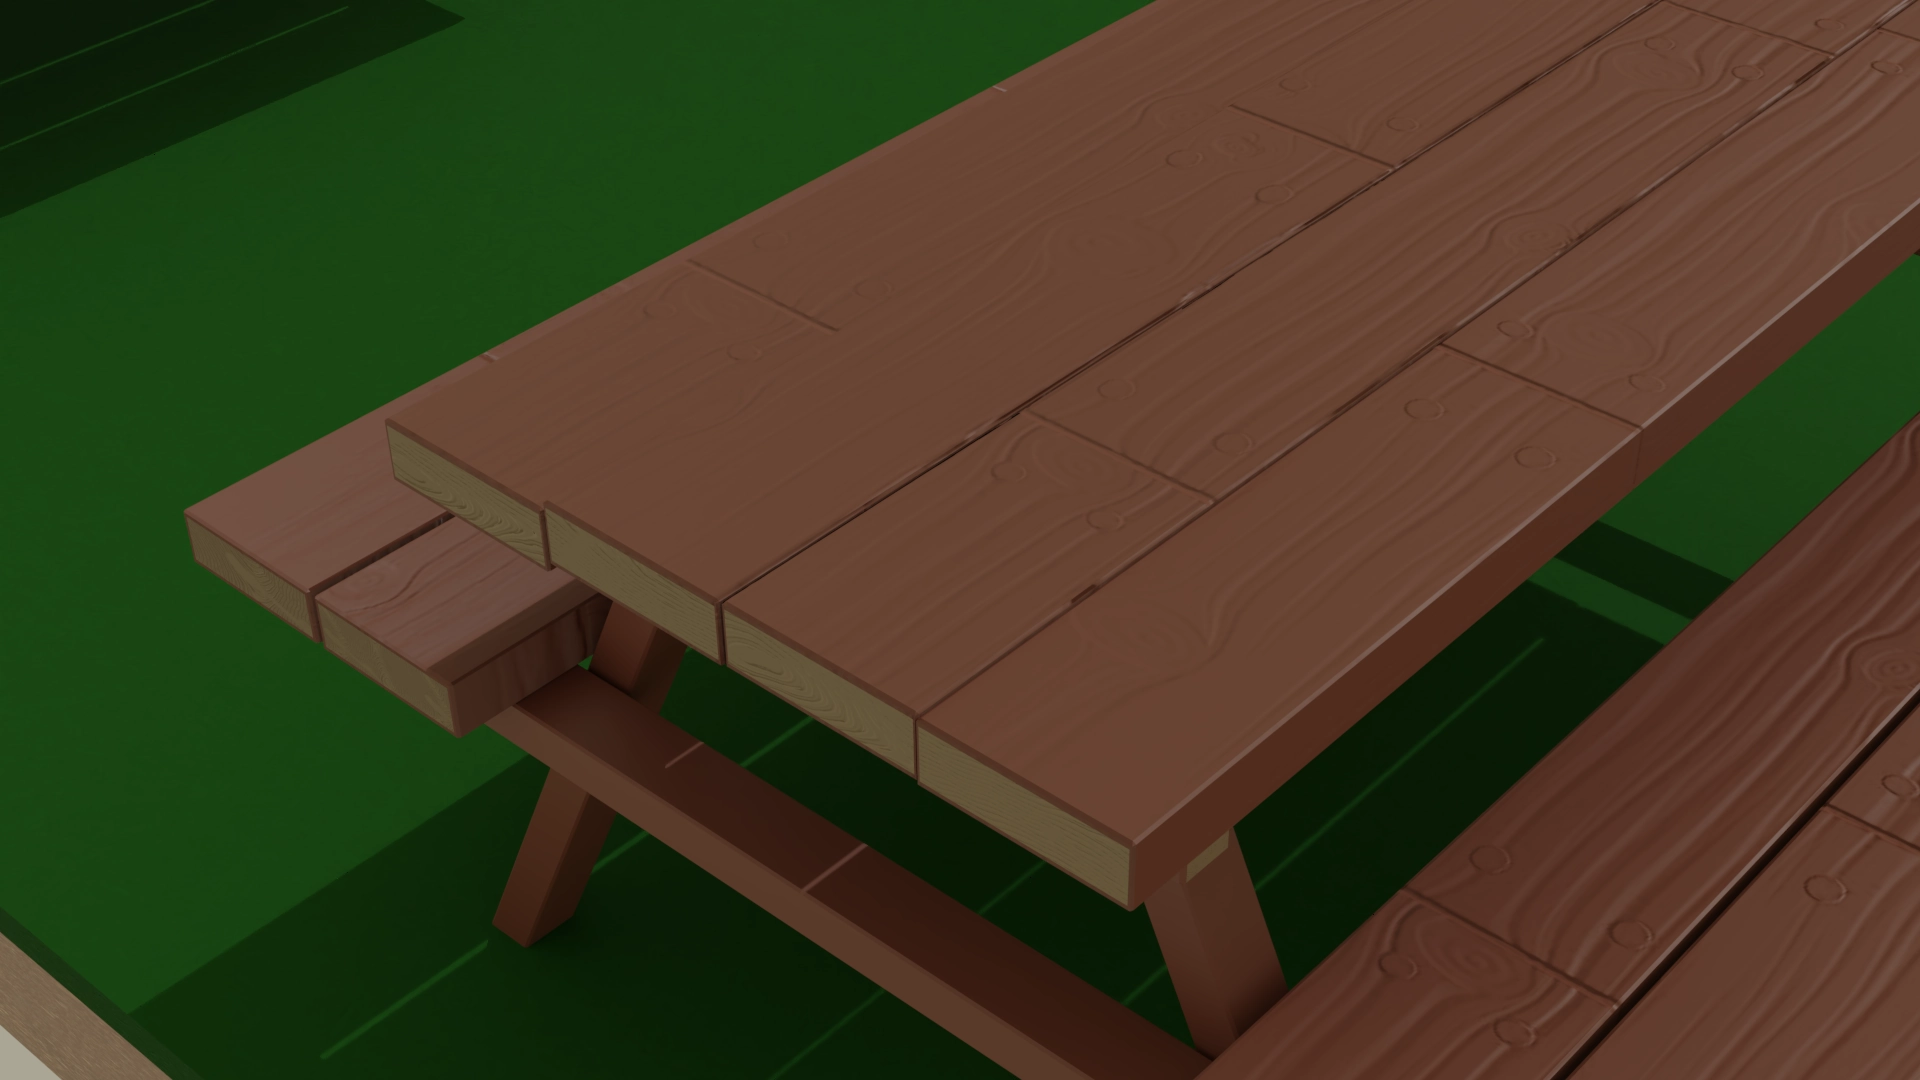
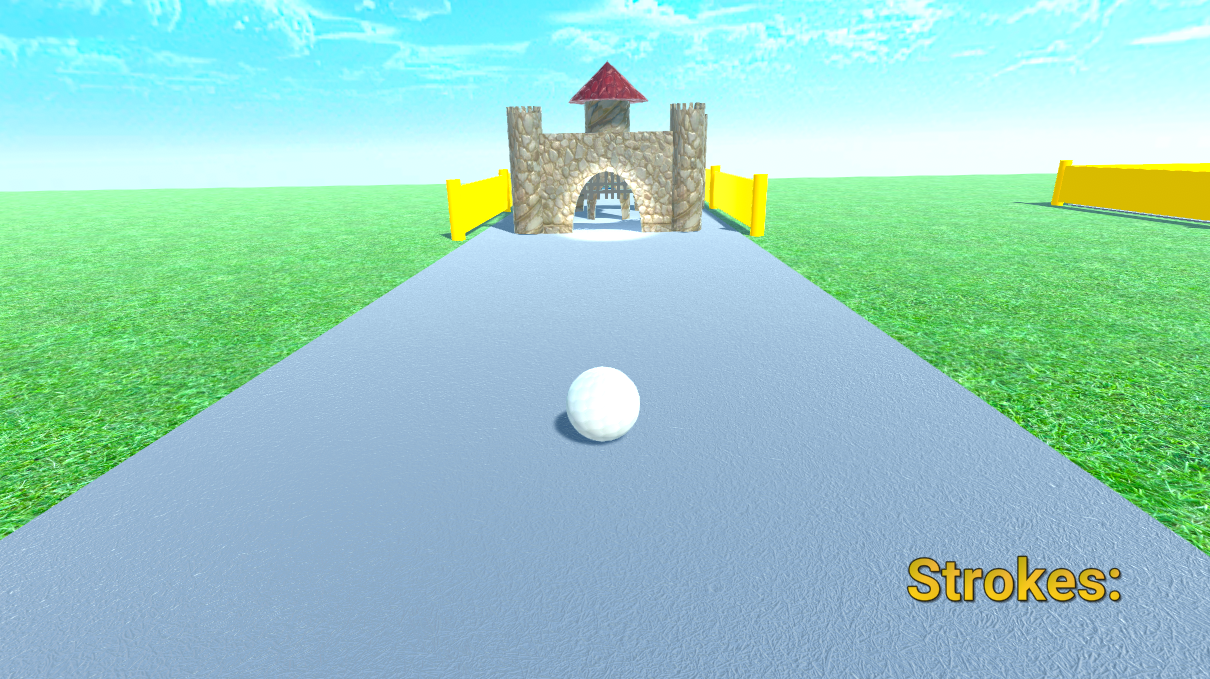
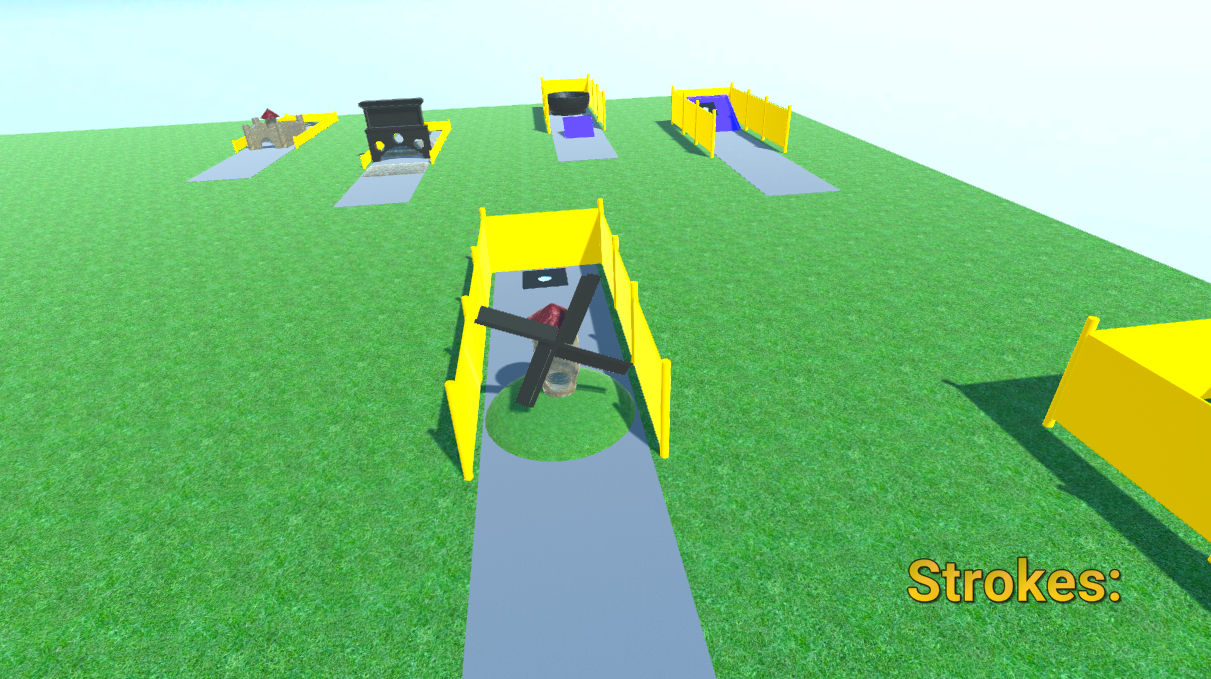
After getting to know the basics, I developed a few iterations of a simple prototype. Often showing another simple addition like changeable scaling of models and constant animation. These prototypes all used image tracking as a base for the AR. This was included in the Unity AR Foundation package but I customised to my liking to account for more specific features, like a scene management system later on.

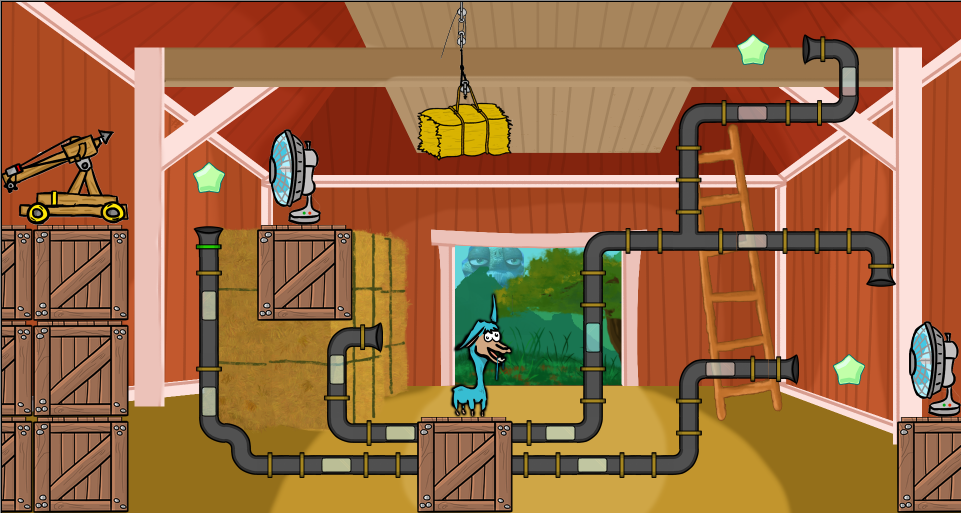
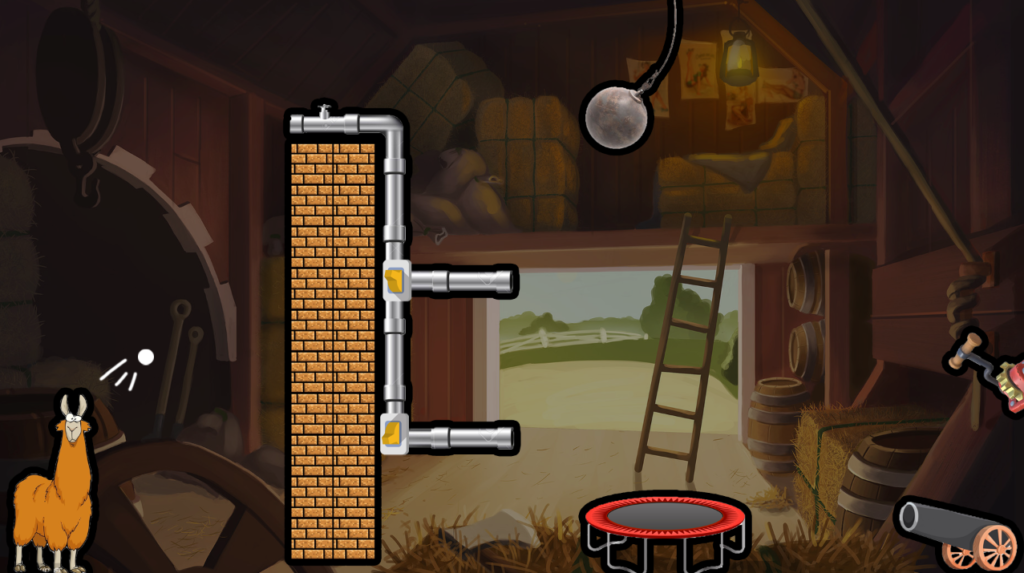
Some of the prototypes in question:

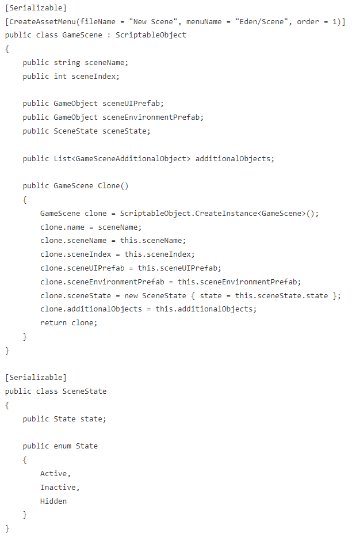
To allow for a scalable and flexible solution regarding scene setup, I decided to use scriptable objects. This made it so that I could easily store data per scene, which could be accessed and modified in a simple manner too. These could hold the necessary references, scene index, environment prefab, etc.

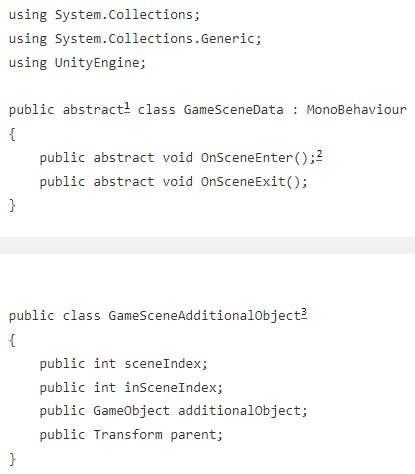
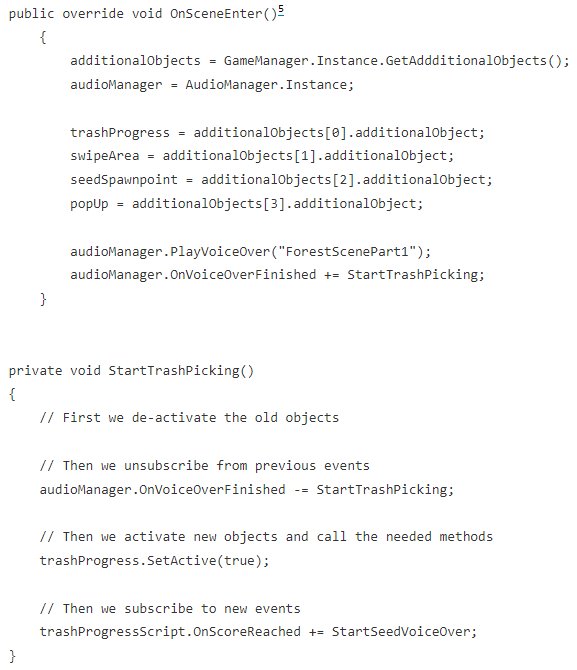
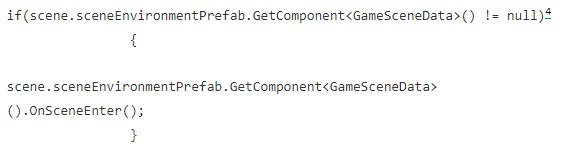
Next to that, I worked with an abstract class structure for the scene specific scripts. This made it so I could easily call an OnSceneEnter() method per scene if another overarching manager script detected it as the currently indexed scene that should be activated. After doing so, I used subscription and unsubscription throughout the scene specific scripts to accommodate for multiple voice overs that depended on other parts, using events and listeners through advance through the scene.


The abstract class and another class holding references to objects in the scene (UI). These would later be stored under the specific GameScene.


An example of a scene specific script, using events and listeners to advance.


The GameScene scriptable object, this holds all data to construct a scene as well as a Clone() method that is called at the beginning, after which “Modifiable” scenes are created to be used throughout the game. This is to protect the actual scriptable objects.


An example of how the scene specific version of the abstract GameSceneData is called. When a scene is detected as indexed and inactive, a check for the script is performed after which the OnSceneEnter() will be called.
The AudioManager script, which uses the LanguageID if applicable to differentiate based on the selected locale.

Having said up the whole project this way I then progressed through the first scene I worked on, eventually allowing me to use this setup to easily and efficiently create the other scenes too as I had already done it once. I had also created an Interactable class, that had an event which would be called upon pickup and allowed for easy addition of new interactables.

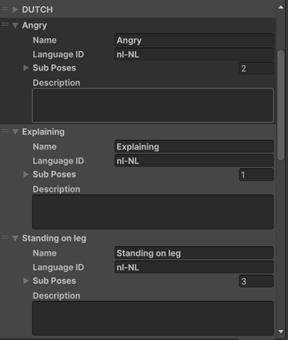
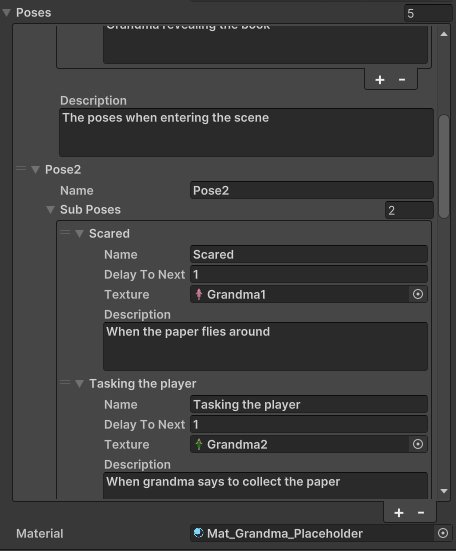
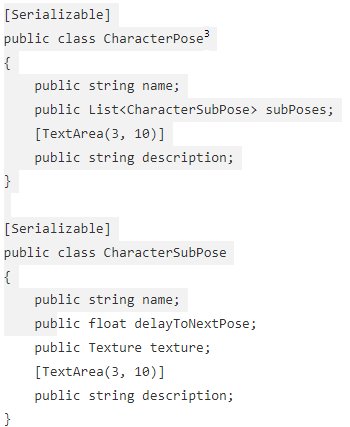
Throughout the whole development, we also encountered some issues. A software called Rive (used for vector animations) did not work with our Unity version and was therefor abandoned. However, we still needed the animations so I wrote a simple script to change images at x rate per frame. Another issue was that we initially planned on 3D modelling all characters but, due to time constraints, we decided against it and went back to 2D instead. This led to us not using mocap animations and I once again had to come up with a creative solution. I set up a system to change the image of a character after x seconds to create the illusion of animation in a sort of ‘visual novel’ style.

An interaction for the scene, involving throwing a seed. This was more difficult than it seems due to using physics which I had never done before.
An implementation of the UI made by the designers, combined with localized strings.
Using the previous seed throwing to spawn flowers on the ground.
Another simple addition using a shader in code, by lerping through a value I created a transition in the grass.
The custom ‘visual novel’ style animation, using 2D character frames.
Using the visual novel animation.


The editor when using the CharacterTextureReplacing script, which is responsible for the custom frame animations.


The specific classes the CharacterTextureReplacing script uses to show an easy editor.

For the next few scenes I had to implement some new interactions, collecting paper that flew everywhere, gathering ‘collectables’ like a bracelet and compass and more.

The initial tests to create paper-like physics.
The collectable bracelet.
Adding a new interaction that allows players to choose their desired seed to plant a flower of their choice.
The implemented flying paper, using the Interactable class.
The collectable compass.
An implemented compass UI, UI was made by another member of the team and shows a ‘finger’ of the hamza after the completion of every scene.

And finally, combining everything previously shown and some other additions I had no other footage of. The full playthrough.

Note: there were still some inconsistencies when recording this but it has all been ironed out now.

Week 8 – Amsterdam trip and trash picking

APRIL 8 → APRIL 11 – 2024

Tasks

Amsterdam Trip

  • We met up with Abner at the trainstation of Amsterdam Amstel after which we had a busy day, filled with meetings with employees from various museums as well as the museum our installation will be placed in.
  • Learned more about consumer engagement in museums by observing the inner workings at Tellarts, Micropia and JCK.

Technical Developments

  • Managing version control
    • Taught another team member the proper way of working with Git through Pull Requests, Code Reviews and Merging.
  • Assisted on a UI issue
  • Rewrote script to keep track of the amount of trash collected in the scene three interaction

Miscellaneous

  • Mid term peer review (see image below)
    • Filled in the peer review spreadsheet to identify areas of improvement.
  • Procedural Art redo

Double Diamond

The majority of this week was spent outside of development but I still managed to do some work. Most of this was to do with the rewriting of a previously made script for trash collecting, more specifically the score tracking for it.

Discover

I came up with a more flexible solution that would lower the number of lines in the script as well as providing a more efficient solution in general. (see code below)

Define

The trash progress script showed a pop up with specific type and scoring for every object that was picked up. We decided that that was not necessary and so I rewrote the script to set it up more scalable and future proof.

Develop

I threw out the previous code that went through a Dictionary of trash types with their respective scores and instead simply added the score to the current score. This should see some more improvements later.

Deliver

As the development made this week was not visually different there was no specific deliverable.

Plan

Next week I will focus on finishing up scene three as far as possible to create a sort of vertical slice. I will also research how to set up the various scene in terms of functionality.


Research

This week my research was mainly conducted in person with several employees from aforementioned museums. Next to that we observed and learned from the existing interactions in these museums.


Reflection

This week was a hectic one, from Amsterdam to Enschede and finally Veenendaal. I moved around a lot and was also distracted by my redo for Procedural Art. Looking back at it, I could have done more this week but in the end I am not unhappy with the results I achieved and moreso the experience gained from the trip to Amsterdam.

We learned quite a lot and got to experience really cool installations too, which is always very valuable.

Looking at the peer review my main areas of improvement would be arriving on time and being more vocal about providing feedback and motivating my fellow team members.

Media & code

public void SetTotalScore(int score)
    {
        List<Trash.TrashType> trashTypes = new List<Trash.TrashType>();

        foreach(TrashItem trashItem in trashItems)
        {
            if (trashTypePair.ContainsKey(trashItem.trash.trashType))
            {
                trashTypePair[trashItem.trash.trashType] += 1;
            }
            else
            {
                trashTypePair.Add(trashItem.trash.trashType, 1);
            }

            if (!trashTypes.Contains(trashItem.trash.trashType))
            {
                trashTypes.Add(trashItem.trash.trashType);

                GameObject item = Instantiate(itemPrefab, itemParent);

                ItemData itemData = item.GetComponent<ItemData>();
                itemData.icon.sprite = trashItem.icon;
                itemData.scoreText.text = trashTypePair[trashItem.trash.trashType].ToString();
            }

            totalScore += trashItem.trash.Score;
        }

        Debug.Log(totalScore);
        totalScore += score;

        RefreshUI();
    }
Our filled in peer reviews.

Protected: IMT&S

This content is password protected. To view it please enter your password below:

City Building Card Game: Stadsbouer

The game can be found on itch.io. It is only a prototype and a mere proof of concept and because of that, there are still things missing and parts left unpolished.

I have worked on this game for around 6 weeks. Mainly focussing on the programming side of things this time around.

It all started with a very basic game concept, I wanted to combine the card game and city builder genres. This would be done in Unity, making use of local turn-based gameplay where the players could play cards and throw a dice to activate said cards.

First gameplay sketch

The gameplay would be based around earning money through activating your cards/buildings which would then lead to more money etc.
I also thought of a prestige mechanic which is currently not being used but I plan on using it as a general currency to unlock more cards in the future.

The GDD can be found here.

Chicken Party Game: Eggsplosion

This game was created during a semester-long project in which I led the project and contributed with design and programming.

Eggsplosion is now on Steam! You can click the button down below to add the game to your library!

I have taken the lead role in this project since it started but even more so when we decided to put it up on Steam. Since then I have worked on the following things:

  • UI/UX programming and implementation
    • In-game pause menu
    • Options screen
    • Leaderboard UI handling
    • Various smaller improvements
  • Content creation
    • Gameplay trailer
    • Short video content (Tiktok, Instagram, Youtube shorts)
    • General social media (previous + Reddit, Twitter(X))
  • Steam
    • Store page
    • Game builds
    • Announcements
    • Steam Features
      • Steam Input
      • Steam Cloud
  • Project lead (and lead designer)
    • Keeping things on track
    • Managing a trello board
    • Version control
    • Communication with team
    • To-go for any issue
    • Game design

Now about the game, Eggsplosion is a local multiplayer fighting/party game in which you play as a chicken against chickens.

The gameplay is quick and short but a lot of fun. There are different powerups spawning around the various maps that can change your projectile type or give your character certain boosts.
Down below I will go into further detail regarding the design process and UI/UX and level design implementation.

The game/level design

Specifying our chosen concept
Sketching out the first level

Our first brainstorm session

Coming up with the initial game concept

The powerup design

Brainstorming about powerups
Prioritising and categorising the powerups
Combining powerups and balancing

These sketches and brainstorming documentation eventually led us to the first real prototype of which I, unfortunately, do not have footage.

I do have a before and after for the level I worked on

I also worked on the user experience which was not my best work but I have made major improvements since my first try, at the time I did not have any knowledge of Unity’s new input system which held me back a bit.

Since then I have tested and received feedback which resulted in some big improvements. The majority of the complaints were about bad menu flow or confusing things happening.

  1. There was no prompt indicating which button the player had to press to join the lobby.
  2. Also, the players had to navigate upward and click the buttons to raise the number of rounds. As our game is for controller only this was unnecessary and thus I removed it and replaced it with the shoulder buttons.
  3. I did the same for the ‘return’ button, this no longer has to be navigated to but instead the player can just press the east button on their controller.
  1. The navigation felt confusing and too responsive. To fix this I limited the navigation to the three main buttons on the left.
  2. I then opted to add button prompts and check for those inputs which would in turn invoke the button events instead.
  1. This screen was visible between rounds to show the current score. However, a lot of times the players clicked the quit button which instantly took them back to the main menu forfeiting their progress up to that point. This was really frustrating.
  2. I added button prompts and removed navigation, instead the player can continue with the usual south button (X) and can return with the usual return input (O).
  3. After clicking the east button there now is an extra prompt asking you to confirm to leave the game. For the protection of the player’s current progress.

After making these additions along with several others, I felt it was time to get this game up on an actual storefront so more people will get to play it.
I then set up a team meeting and the game has since been released on Steam! Check out the trailer below.

Streaming Site Mock-Up: CMGTwitch

Introduction

This was one of the most fun courses I had this year, I really like working on UI/UX in general so getting to do that for another subject is great. Last year I scored a 9,5 for UI/UX Design. This course builds upon that one so I knew that I wanted to try and get the 10/10 this time around.

Documentation of this whole process can be found here (evaluation report) and here (product report).

Requirements

The necessary elements for this assignment were as follows;

  • Find past, current and upcoming lectures, and join them if possible.
  • Find specific topics covered in recorded lectures so they can skip to what they are looking for.
  • A built-in chat function that encourages constructive discussions rather than spam.

Research

  • Twitch
CMGTwitch

Lo-Fi Prototype

In the end, I analysed the CMGT logo to create a colour palette and based on that created a style sheet.

Then I created the first lo-fi prototype. Said prototype can be found here.

This home screen is present in my lo-fi prototype.
CMGTwitch Style Sheet

The next step was to user-test my first prototype. I did this with three other students. The main things to take away from the tests are:

  • The top bar is weird, it is incorrectly spaced and the elements feel out of place.
  • The icon for a teacher on the lecture page is too big.
  • There should be a filter to find the right module/teacher faster.

Then I worked on the hi-fi prototype. For this, I included the improvements made based on feedback from the user test, an A and B versions and a brief user functionality description.

  • The homescreen present in the hi-fi prototype.


The prototype can be found here, the form used for testing can be found here.

After letting users test my hi-fi prototype it became clear that the hypothesis was right.
Version B was in fact easier to use in terms of navigation than version A.

Creating the final prototype using HTML, CSS and Javascript. This one can be found here.

In the end, I managed to score a 10/10 on this course. It was a great subject and I really enjoyed working on UI and UX again.

Management Simulation: Food Frenzy

Personal portfolio was a rather difficult subject for me. I had so much that I wanted to do but I did not know where to start. I had many ideas, one better than the other and another way too ambitious. Not knowing better I chose the latter. One of the games I have always wanted to make was an economic simulation game with food trucks.

I created a basic setup for my game in Unity. The main things I wanted to implement were good-feeling camera movement, an object placement system and basic UI. These were the iterations that I made:

The core thing I learned from this was that functionality is more important than visuals when prototyping. This is obvious but it is something I have struggled with before as I like to make everything look decent first.

I also wanted to create three different low-poly 3D models. A food truck, a picnic table and finally a tree. As shown in the videos above already.

3D modelling is something I really enjoy, it feels as if I am drawing digitally.

Finally, the last thing I did was document the general idea of the game. The document I wrote can be found here.

Time to move on to the next part where I continued my work on food frenzy.

Interactive Storytelling: G.E.N.I.U.S.

For immersive storytelling, I was tasked with creating a story that deployed the basic elements of storytelling. This whole process was documented to justify the choices I made and explain how all storytelling elements were implemented. The said document can be found here.

To do this, I used Twine. I created over 50 passages, wrote over 8000 words and used over 10 different variables to create a highly interactive story.

The story structure for “The G.E.N.I.U.S. Facility”.

I wanted to write a story that actually had a little bit of meaning to it, while also trying to make the most out of the subject. In the end, I created this story. It is about a boy, named #13, he has been locked up in a facility for as long as he has known. Tasked with creating a solution for global warming he and a dozen other kids just like him have to go to school to work on the Great Invention every day.

As it turns out, he has been working for G.E.N.I.U.S (General Enablers of New Inventions in Uprising for Sustainability) since he had been taken away after kindergarten. When in kindergarten, the children have to take a IQ test on Save The World day. If their score passes a certain number they were transferred to one of the hundred facilities all around the world. Here they were tasked with coming up and creating the solution for climate change.

In the story, I implemented 8 different endings, with the use of variables I made it so that every choice has an outcome somewhere in the story. For example, when you decide to stay in bed at the beginning you will be reprimanded and lose free time privileges for the day. But if you manage to try and escape through the office you get a chance at reading your own file. This file contains an evaluation of the trouble you got in. If you didn’t stay in bed that morning, nothing will be there. If you did, however, it will say that you showed rebellious behaviour on that day.

These little things are what make the story so interactive. There are a lot of different things just like this in the full story, I could list them all here but I think it would be better if you just read the story yourself. Click the button below to do so.

Golf Game: Golf Without Your Friends

At the end of the first year, we finally started with Unity. In my free time I had used Unity a bit before and in comparison to Processing, GxP and Flowlab.io it allows you to do so much more. I was really excited to start working on this subject and I had a ton of ideas.

I went ahead and started working on a golf game. I called it “Golf Without Friends” (a parody of golf with friends) as it is a single-player game.

During the process I followed some tutorials, the most important one being this one. After watching that I was able to implement the movement of the golf ball and the action of controlling it. I then went on to 3D model all of the different holes (levels) I wanted to create.

Some of these levels I based on my recent mini-golf experience. Others were based on inspiration I found on Pinterest. After 3D modelling them I looked for materials that would fit them well.

The final step was to use post-processing, this is where the visuals were improved a lot just by tweaking some image effects. I also added a motion blur to improve how fast it felt to hit the ball and a custom skybox as I wanted real clouds and better environmental lighting.

If you want to play the game yourself, you can click the button below.

Project Final Approach: Spit Happens

The trailer for “Spit Happens”.

I got to work with a great team of fun but hard-working people and we delivered a game we called “Spit Happens”.

The goal of the project was to create a “physics-based” game as the Engineers had just finished a subject related to physics. We came up with the idea of creating a game in which you have to control a llama. The main mechanic is “spitting“. We took inspiration from games like Where’s my Water and Cut the Rope.

As a designer, I mainly focused on gameplay design and merchandising. I did this with one other designer. We started with some level design concepts.

The first low quality level concept.

The goal of the game is to take down a hay bale that is hanging from the roof so that you and your Llama friends can eat.

ObjectAction
FanBlows the spit further.
CrossbowShoots down the hay bale.
ButtonTakes down the hay bale.
CannonShoots the spit further.
PipesTransports the spit.
All actions that each object can perform.

Then I worked on the target group. For this I had to do some research and use the theory taught in the previous term. This resulted in the following target group:

The target group for ‘spit happens’ is all ages but we focus more specifically on the ages of 7-12 and a male audience. Reasons for this are: Mastery which gives them pride, mastery is created by letting a man play against himself. Males experience pride in artificial goals, such as achieving a level 100%. 

Then from the age of 7 kids are able to think things through and solve hard problems., at the age of 10-12 boys are more passionate about games and they want to prove themselves. So we mainly focus on that group where the problem solving starts until the more mature age of gaming starts. And our game will be good for mastering which speaks more to men. 

As the project progressed further we got our hands on some of the assets made by our artists which we then used to further work out some level designs.

  • Level one.

Soon after we created the levels in Tiled. We created three different levels with a new component being introduced at every level.

  • Level one.
  • Level one.

Then finally the art was finished and we finished the levels with the new sprite sheet as well as some small updates.

The only thing left to do were the promotional solutions, as this is generally not a very serious part of the assignment we went all out. From t-shirts to socks all the way to an exclusive pringles can.

In the end, I look back at this project with gratitude, I enjoyed working on the game, working with the team I got to be working with and we received a good grade as well. The game can be downloaded through the link below.